
About MAAS 3.0 and LXD
by Bill Wear on 19 August 2021
With the release of MAAS 3.0, we moved LXD virtual machines out of Beta. Several articles in the MAAS documentation address LXD. Since no document ties all these features together, though, it’s time for a topical blog about LXD.
About LXD
LXD, pronounced “lex-DEE,” is a container manager, as well as a virtual machine manager. LXD offers a user experience that is very similar to virtual machines.
The MAAS core team carried LXD through several versions of MAAS as a Beta option. We wanted time to test the integration of MAAS with LXD and ensure that users had the opportunity to shake it out. Since it has proven to be very stable and useful, it was promoted to a mainstream feature with the release of MAAS 3.0. Along the way, MAAS also integrated support for LXD projects.
From a user perspective, advantages of choosing LXD over libvirt are that LXD offers a nice REST API and that it is a Canonical product, which allows for a tighter integration with MAAS.
About using LXD as a VM host
When you create a KVM with MAAS 3.0, the MAAS UI pre-selects LXD as the default KVM host type:

Notice that the “Beta” designation has disappeared. You must enter a name for the KVM host, and an LXD address (more on that in a minute). When you’ve done so, and you click “Authenticate,” you’ll see the projects screen:
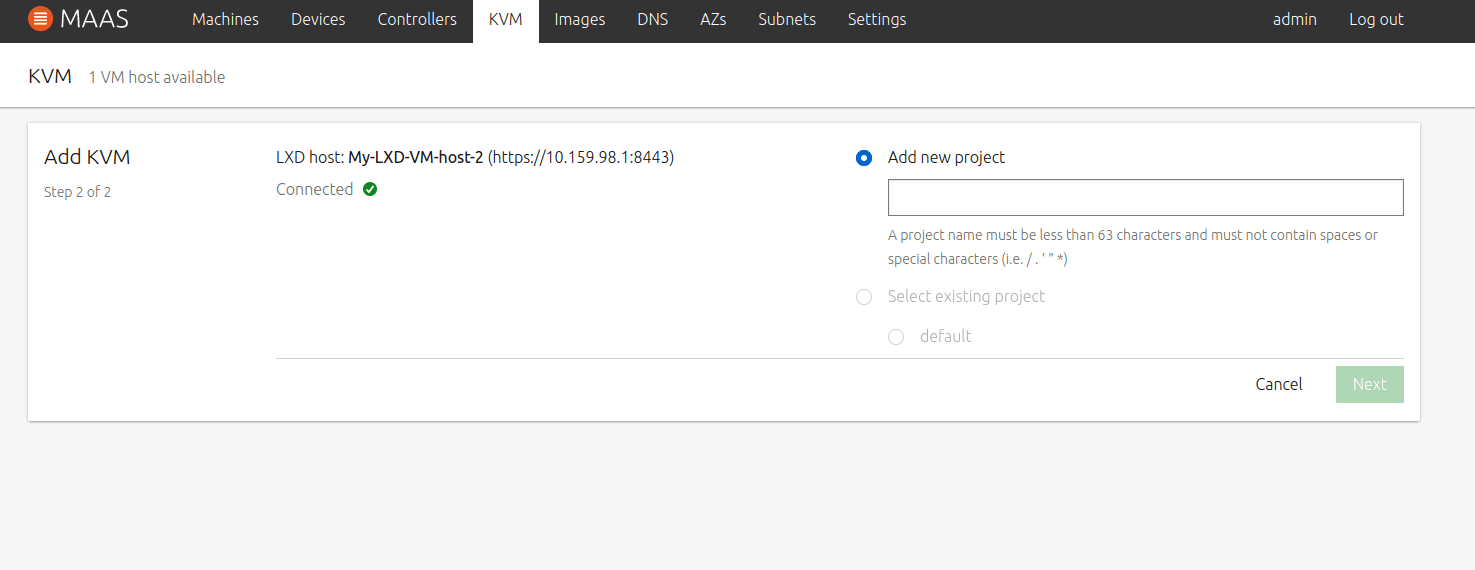
You can choose an existing project (in this case, “default”). You can also create a new project in real time, using the Add new project box:
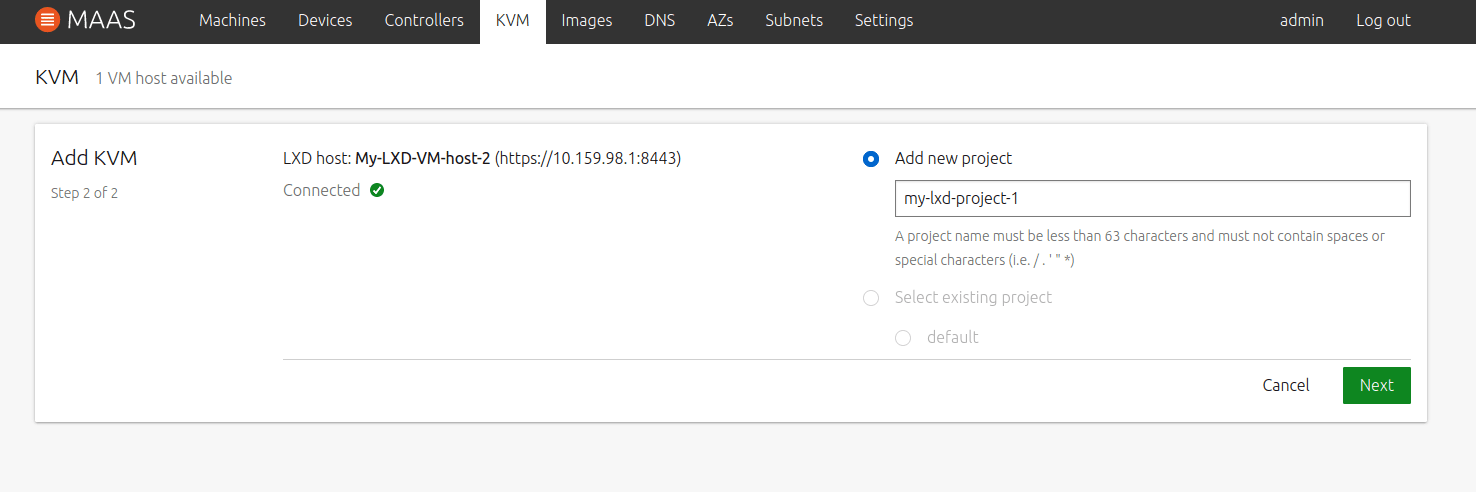
Clicking Next brings you to the detail screen for your new, LXD KVM host:
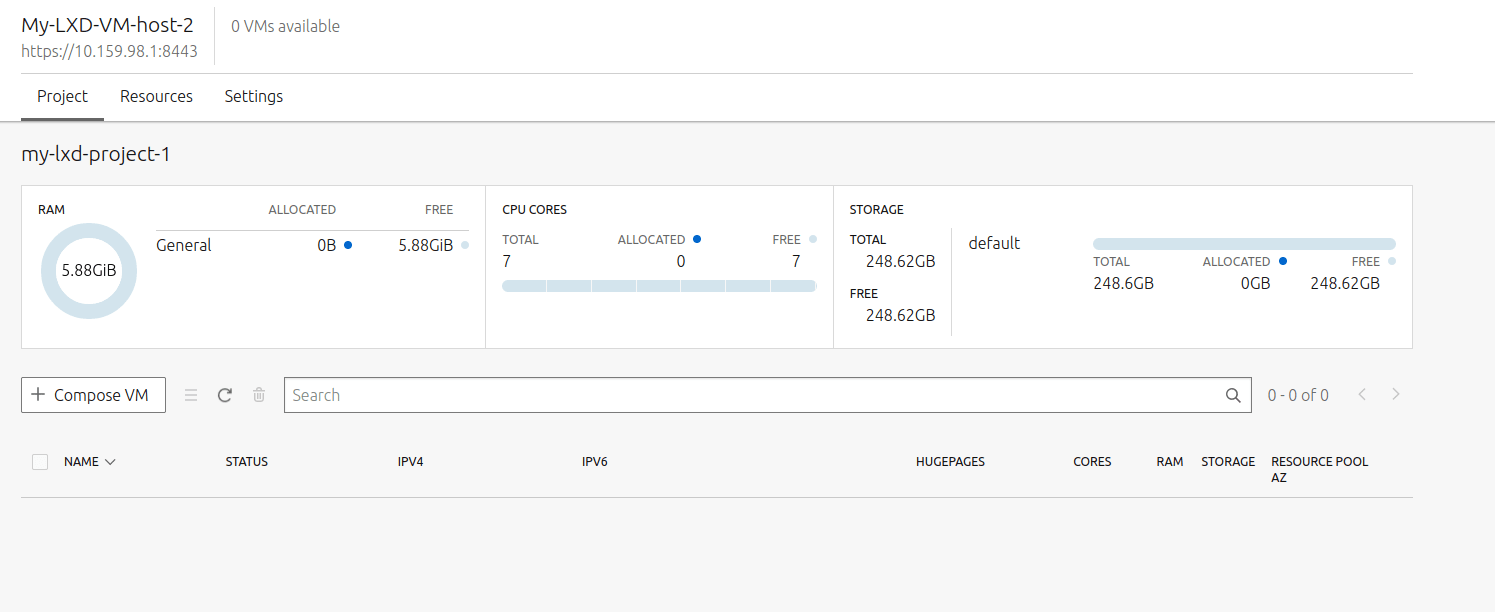
Any VMs you create for this LXD KVM host will be assigned to the project my-lxd-project-1. You can compose a new VM within this KVM by simply selecting the + Compose VM button:
When you use lxc list to view your LXD inventory, you probably won’t see your newly-minted VM by default:
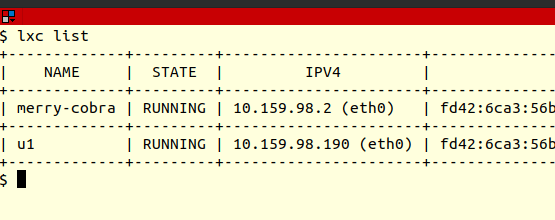
Instead, you would need to switch to the LXD project that you created when composing the VM:
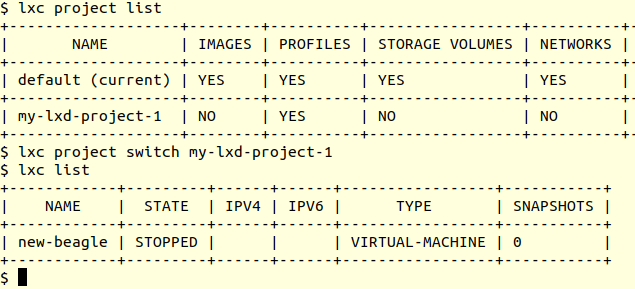
You can create LXD projects as desired; it’s an easy way to group virtual machines
About addressing LXD
We’ll round out this blog with a note about LXD networking and MAAS. When you initialize LXD after installation, via lxd init, you have the option to create a bridge. If you choose the defaults while doing so, you should be able to communicate with LXD containers from MAAS. Here’s a cheat-sheet:
Would you like to use LXD clustering? (yes/no) [default=no]: no
Do you want to configure a new storage pool? (yes/no) [default=yes]: yes
Name of the new storage pool [default=default]:
Name of the storage back-end to use (btrfs, dir, lvm, zfs, ceph) [default=zfs]: dir
Would you like to connect to a MAAS server? (yes/no) [default=no]: no
Would you like to create a new local network bridge? (yes/no) [default=yes]: no
Would you like to configure LXD to use an existing bridge or host interface? (yes/no) [default=no]: yes
Name of the existing bridge or host interface: br0
Would you like LXD to be available over the network? (yes/no) [default=no]: yes
pAddress to bind LXD to (not including port) [default=all]:
Port to bind LXD to [default=8443]:
Trust password for new clients:
Again:
Would you like stale cached images to be updated automatically? (yes/no) [default=yes]
Would you like a YAML "lxd init" preseed to be printed? (yes/no) [default=no]: no
Note a couple of key points here:
Would you like to configure LXD to use an existing bridge or host interface? (yes/no) [default=no]: yes
Name of the existing bridge or host interface: br0
Would you like LXD to be available over the network? (yes/no) [default=no]: yes
pAddress to bind LXD to (not including port) [default=all]:
Port to bind LXD to [default=8443]:
Trust password for new clients:
Again:
It doesn’t matter whether you let LXD create the bridge for you (most common) or use a bridge that you’ve created (what’s done here). When creating the LXD address, you’ll formulate it like this:
https:// + <first three octets of bridge address> + .1:8443
e.g., "https://10.49.16.1:8443"
Likewise the password will be the “Trust password” you entered while initializing LXD (above).
Pausing for experiments
There’s quite a bit more to say about MAAS 3.0 and LXD KVMs / VMs. We’ll cover that in later blogs. For now, try experimenting with MAAS 3.0 and LXD.
Related posts
Cut data center energy costs with bare metal automation
Data centers don’t have to be power-hungry monsters. With smart automation using tools like MAAS, you can reduce energy waste and operational costs, and make your infrastructure greener, without sacrificing performance or flexibility. […]
Effective infrastructure automation to reduce data center costs
To truly reduce OpEx, you must shift your perspective from seeing operations as custom, artisanal work to one where operations are standardized, automated, and repeatable. In other words, commoditized. […]
OpenStack with Sunbeam for medium-scale cloud infrastructure
The rapid growth in OpenStack installation and orchestration tools that we have seen in recent years has effectively established OpenStack as the world’s leading open source cloud platform. Projects like Sunbeam or Kolla Ansible, for example, are effectively transforming OpenStack into yet another user application. By using containers and […]